I feel I have gone a little missing on this blog and I must say that it is not from a lack of sewing and therefore things to post but from a crazy, hectic April/May. I wonder if there was some wacky moon cycle or that the world in the Southern hemisphere went cray cray in the lead up to Winter (quick, do stuff before it gets cold) but we just had a few months jammed full of travel, parties, birthdays, house guests and more house guests. Not that I am complaining and to be honest it didn't stop me sewing but, it did stop me blogging! So apologies all but we do have a lot to catch up on, namely: 40th dress; second 40th dress; dress for another 40th party; jacket for dress for 40th party; dress made with new overlocker; a new top; rope baskets (don't ask); and, finally, a skirt...
Hmmmmm, that is a lot of dresses....

Friday, 3 June 2016

Monday, 21 March 2016
More dresses with Boundless Style
I realise I made a declaration right at the start of this year that I focussed too much on making dresses and I was right. I have diverted my attention to practical skirts and 'wear all the time' yoga pants but when I spotted this pattern book I could not resist.

It is a choose your own adventure for dress designing with 5 bodices, 5 sleeve and 5 skirt patterns that you can mix and match to create your own dress pattern. Neat, hey. The instructions on each pattern are excellent and there is a whole section at the back on putting the skirt, bodice and sleeve together. If you visit Victory Patterns website there is an awesome Lookbook where you can play around with what the skirt, bodices and sleeves might look like together. I was quite taken with this dress from the book...

and after playing around with the Lookbook I decided on this combination:

I have my birthday coming up and we are having a bit of a celebration so I picked some fabrics for an all black version - a black and sparkly large print houndstooth and a mesh and PVC flower contrast (very Mardi Gras I know but I think it will work)

Do you know the best thing about making your own party dress? I will feel no guilt about spending a little more than I usually would on a belt to wear with it!

Wednesday, 16 March 2016
A respectable pair of leggings
One of the things I have learnt so far in this year of no clothes buying is how excited you can get by a simple and fairly basic item of clothing - in this case leggings. I know - not so exciting and super practical but imagine finding that perfectly fitted pair of yoga pants - no sagging at the butt, too tight across the hips, low crotch or camel toe - eeeek, stop, please stop! I have spent many hours pulling on yoga pants in techno blasting, gym junkie shops as well as hipster, yoga loving establishments who don't blink an eyelid at charging well over $100 for a pair of their leggings. Well no more I say, no more! I think I have found the perfect pattern!


I know, it doesn't look much and to be honest there is no pretty way to photograph such a basic item of clothing (side note: I tried photographing on my blue and white bed spread but I am not convinced with the result). So what do I like about the pattern - most of all, the fit. Snug but not too tight in all the right places and a perfect 3/4 length.

I love the concealed back pocket, the perfect size for a phone.

And, I love the top stitching in stitch #8 on my new Bernina.
So, what's not to like? Well, the fabric choice! I chose a heavy weight 4 way stretch but to honest there is not enough recovery - in other words, great when you first put them on but after an hour (OK half an hour) with the personal trainer (another new year's resolution) they sag a little and require lots of very inelegent hitching up. I am looking forward to repeating this pattern but this time with the correct fabric. I think this one will do and maybe a third pair in Tickle me pink or Electric Lime..... maybe...
Monday, 7 March 2016
Pacific leggings yoga pants - Sewaholic patterns
When I had initially (stupidly?) decided to make my clothes for a whole year I was bent on the idea too of drafting all of my own patterns. I very quickly realised that this adds a whole extra bunch of steps to the clothes making process - drafting the pattern, trialling the pattern, adjusting the fit, re-drafting the pattern and then, finally sewing the pattern! And while I have built up a sizeable collection of patterns I don't think I would survive a year on the patterns I already have, especially when it comes to more complex patterns like yoga pants! So, instead of drafting all of my own patterns I will use this year to try some different independent pattern designers I have admired but have never tried. First pattern to trial was one from Sewaholic patterns. I have loved Tasia's patterns for a long while and being a pear shaped gal myself I was interested in the her patterns and designs! I have also admired the determination of one girl from Canada, tired of her everyday job, to set up her own pattern making business and turn it into the success it is!
I actually purchased this pattern a while back but hadn't used it yet. It is pair of leggings from her active wear collection called Pacific leggings and perfect for wearing to yoga class (or more likely school drop offs!)

I actually purchased this pattern a while back but hadn't used it yet. It is pair of leggings from her active wear collection called Pacific leggings and perfect for wearing to yoga class (or more likely school drop offs!)
I liked the contoured shape and the simple yet elegant fit. My next task is finding fabric. In my trawling of the internet I stumbled upon Fehr trade and her list of fabrics for sewing Active wear. Looks like I need to keep my eyes open for Supplex on my next fabric store visit!
Monday, 29 February 2016
A faded denim skirt
It has been a few weeks since my last post - weeks of a lot sewing and not a lot of blogging so I have a few projects to bring you up to speed on. Firstly, of course the denim skirt and my adventures in distressing. The first step was to rough it up a little. My tools of torture were a cheese grater (a bit too chunky for what I wanted), a nail file and some sand paper. It actually felt counter intuitive to attack a piece of clothing I had only just created but I dived in and this was the result:


A good start but not exactly the vision I had in mind. The next step - bleach!

I filled the laundry sink, added a slug of bleach and then promptly forgot about in the rush of getting to school. It was therefore left a little longer than expected but I am pleased with the result:

I like that the two denims are now more of an even match:

And by pure fluke I even managed to achieve that creased faded look of old denim:

All in all I am impressed with what a little sandpaper and a sink of bleach can do - a much, much better result than sticking it in the microwave or wearing it without washing!
Monday, 8 February 2016
The ins and outs of fading denim
Boy did I open a can of worms when I googled "how to fade denim". There are some serious purists out there with some quite strong opinions on the "right" way to fade raw denim. Here are some of the ways to create the perfect fade for your denim (some of them, in my opinion, completely outrageous!)
1. Microwave them -the opinion is that the microwaves break down the chemical compounds that make up the indigo dye
2. Take bath in them - yes, while wearing them. Well, all that hot water and bubbles are meant to make the denim shrink to fit your body
3. Rub them with coffee grinds - I guess the abrasion of the coffee beans helps to wear away the denim
4. Take them to the beach for a swim - the water and sand combo allows them to shrink and age at the same time
5. Wear them for a YEAR without washing - this one is definitely for the purists
6. Bleach them - makes sense
7. Use sandpaper to scuff away the edges
9. Cut holes with scissors
10. Get dirty - one website even suggested repairing motorbikes in your jeans!
So, there are a few options that are out straight away. I will not be microwaving them - it sounds like a strange concept based on dodgy science besides, there is a metal zip and haven't we always been told not to mix microwaving and metal? I will not be taking a bath in them (we don't have a bath) nor will I be taking them for a swim at the beach. I will definitely not be repairing motorbikes in my skirt and neither will I be WEARING IT FOR A YEAR WITHOUT WASHING!! What! Yep, just no. There is even a forum where people post pictures of their faded denim including information about how many washes it has had - this wearing them for a year without washing is a real thing. I found it weirdly addictive to scroll through pages of faded denim - check it out! http://www.heddels.com/fades/
So, I guess I will start with a little abrasion - maybe some sandpaper and even some coffee and take it from them
1. Microwave them -the opinion is that the microwaves break down the chemical compounds that make up the indigo dye
2. Take bath in them - yes, while wearing them. Well, all that hot water and bubbles are meant to make the denim shrink to fit your body
3. Rub them with coffee grinds - I guess the abrasion of the coffee beans helps to wear away the denim
4. Take them to the beach for a swim - the water and sand combo allows them to shrink and age at the same time
5. Wear them for a YEAR without washing - this one is definitely for the purists
6. Bleach them - makes sense
7. Use sandpaper to scuff away the edges
9. Cut holes with scissors
10. Get dirty - one website even suggested repairing motorbikes in your jeans!
So, there are a few options that are out straight away. I will not be microwaving them - it sounds like a strange concept based on dodgy science besides, there is a metal zip and haven't we always been told not to mix microwaving and metal? I will not be taking a bath in them (we don't have a bath) nor will I be taking them for a swim at the beach. I will definitely not be repairing motorbikes in my skirt and neither will I be WEARING IT FOR A YEAR WITHOUT WASHING!! What! Yep, just no. There is even a forum where people post pictures of their faded denim including information about how many washes it has had - this wearing them for a year without washing is a real thing. I found it weirdly addictive to scroll through pages of faded denim - check it out! http://www.heddels.com/fades/
So, I guess I will start with a little abrasion - maybe some sandpaper and even some coffee and take it from them
Friday, 5 February 2016
Two is better than one!
I always think when I try out a new pattern that making it a second time gives me a chance to improve the fit and make the changes that I wished I had made on the first one. So, after the completion of practical skirt number one I backed it up with skirt two - a denim skirt. I made a few changes to the pattern this time - I made it a touch shorter and added some western pockets to the back.


The use of two denims what totally by chance when I forgot to buy enough of the dark denim - whoops. I think I like it though but, to be honest, I am not in love with the newly minted, fresh denim look. I was hoping for something a little more aged with a little more character to it.... Off to search for some tips of ageing denim... Will keep you posted
Wednesday, 3 February 2016
Back on track
After 2 weeks of this...

and this...

I am back to the completion of my practical skirt... taadaa

I love the colour and knee length is super practical. I was pleased with how neatly the fly front worked out and I drafted a kick pleat for the back which makes it easier to move about. Now onto some fun sewing - some tops to go with it!

and this...

I am back to the completion of my practical skirt... taadaa

I love the colour and knee length is super practical. I was pleased with how neatly the fly front worked out and I drafted a kick pleat for the back which makes it easier to move about. Now onto some fun sewing - some tops to go with it!
Monday, 11 January 2016
A practical skirt
The best thing about a new sewing machine is that even the most practical sewing project is exciting! I'm not saying that a useful skirt is not exciting but it does not have the great fabric and flounce I am used to in my endless array of dresses. Having said that, this practical, everyday skirt has been fun for other reasons.
Firstly I have enjoyed my new machine's endless array of presser feet but especially this one - presser foot number 5!


This foot is awesome at sewing super close to the edge for that beautiful edge stitch.... I love it! Not to get all sewing machine nerdy on you but there was nothing worse than trying to execute edge stitching and ending up with a wonky, wavering sewing line - nothing says "HANDMADE!" (and not in the good way) like a line of wonky sewing. Check out the results - the bottom line of stitching, not the top ones, I will talk about them in a bit.
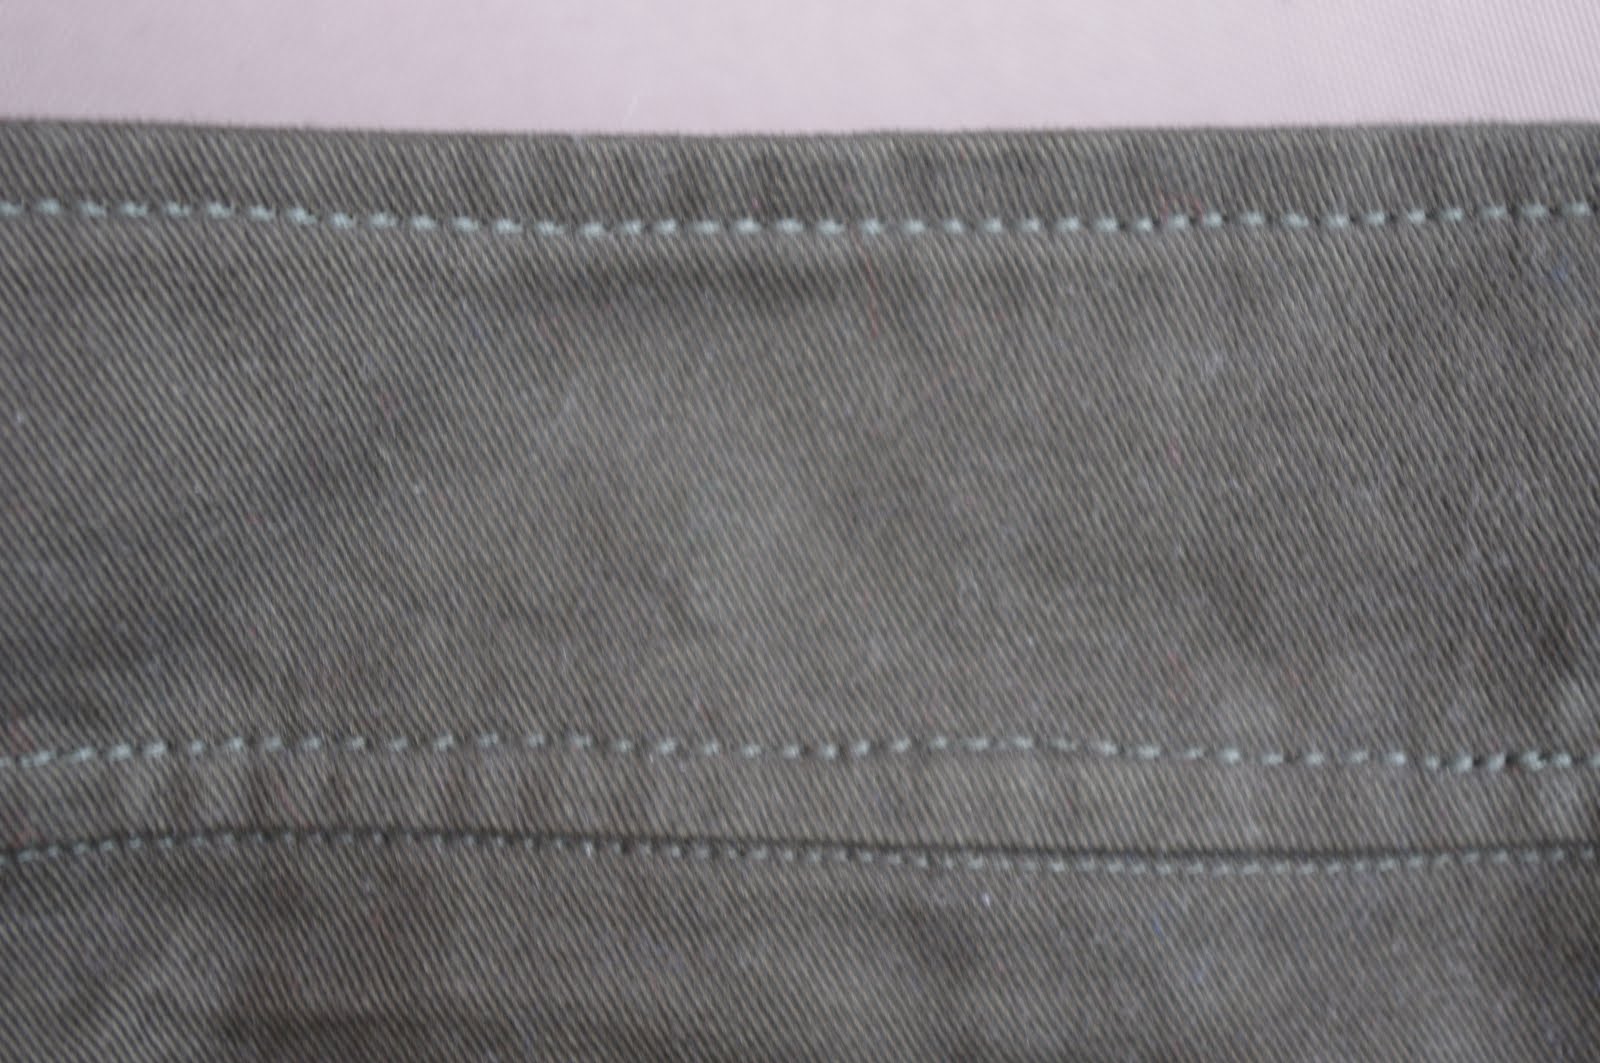
This picture actually brings me to the next thing I am loving about my new machine - the different stitches. I am making a jean skirt so, what better than to use the jean stitch (yep, there is one)

And those, top two rows of stitching in the photo above - yep, jean stitching or stitch #6.
After all that, how's the skirt going? Well almost done. Just a few more adjustments before the final taadaa and reveal of project #1. I've already got my head around the next project... Why have one skirt, when you can have two!
Monday, 4 January 2016
Too many dresses
I guess the first place to start when I am thinking about what to sew this year is to look at what I like to sew and therefore sew a lot of - dresses! I love a floral dress, a backless dress, a formal dress, a throw on after a swim dress - there is something satisfying about creating a whole outfit in one item, of using fun fabrics and sewing something that suits my figure (cinches around the waist and full around the hips). However, if I am going to take this challenge seriously I cannot spend my time sewing dress, after dress, after dress. I need something that is a little less showy, that will be a workhorse for a number of different outfits. I need a skirt.
Rummaging through my box of previously drafted patterns I found this one. A knee length, denim style skirt - perfect.


Rummaging through my box of previously drafted patterns I found this one. A knee length, denim style skirt - perfect.

I love it when I open a pattern I drafted a while back and find little notes to myself on where to add to the pattern and what to change - so thoughtful of me I think.

I have chosen some fabric too - a dark cotton khaki and some fun fabric for the pocket inserts. I find something slightly amusing about having my pockets lined with mini moustaches!

So to begin my first project of the year - nothing too flashy and possibly a piece that no one will really notice but a good foundation piece for my new handmade wardrobe.
Sunday, 3 January 2016
A New Year's Resolution...
It began as it always does on New Year's Day after 2, maybe 3 (surely not 4, definitely not 5) glasses of champagne and a discussion about New Year's resolutions. In fact it probably started a week earlier when I unwrapped a massive box under the tree and revealed this... taaadaaa....

Yep a beautiful Bernina sewing machine, the one I have been coveting for a long, long while appeared under our Christmas tree - yay!
Fast forward to New Year's Day and a conversation around new gym memberships and diets, I quietly wondered aloud whether or not I could go a whole year without buying any new clothes, using my new machine to sew anything I needed. Did I say that out loud? It appears I did and loud enough for others to hear and repeat to more people! "A great idea!" "You should do it!" Yikes, what have I done. Can I do it? A whole year relying on my sewing and pattern making skills to create my wardrobe? Maybe.... Am I going to give it a go? I sure am!

Yep a beautiful Bernina sewing machine, the one I have been coveting for a long, long while appeared under our Christmas tree - yay!
Fast forward to New Year's Day and a conversation around new gym memberships and diets, I quietly wondered aloud whether or not I could go a whole year without buying any new clothes, using my new machine to sew anything I needed. Did I say that out loud? It appears I did and loud enough for others to hear and repeat to more people! "A great idea!" "You should do it!" Yikes, what have I done. Can I do it? A whole year relying on my sewing and pattern making skills to create my wardrobe? Maybe.... Am I going to give it a go? I sure am!
Monday, 12 January 2015
Begin Again
It has been over a year sine I last posted on this blog and my absence was not one that I anticipated or particularly welcomed. I got sick, very sick, and 2014 was a year of hospital treatments and surgery. That's not to say I didn't sew. I did and it was my one chance to grab a little moment of calm amongst a tremendous storm. 2015 doesn't bring a fully clean bill of health but it does bring a change of mindset. A determination - not to let illness define me but to carve out opportunities to do more and more of what I love to do, spend more time with people I love and to deal with whatever comes my way only when it happens. So be prepared for a recap of 2014's projects and some new projects for 2015 starting with the Watson Sewalong and this amazing Powernet...

Stay tuned...
Wednesday, 9 October 2013
Pirate costumes

From Couture to Pirates - can it be done? Well in this little corner of the internet, I say Yes!
This weekend we had a pirate themed 2nd birthday party. I was a little dubious about dressing the girls up as pirates, mainly because Miss S is Miss Independence and HAS to choose what she wears. I thought I might run into a little trouble convincing her to put on a pirate costume, especially as going to a party means a party dress and sparkly shoes. I can't help it - I have a mother and a mother-in-law who loving shopping for pretty dresses! For this reason I steered well clear of the pirate cliches of skulls and crossbones. I even avoided the nautical ones of anchors and sailing ships and instead chose fluro orange whales - not necessarily what jumps into mind when you think pirates, but stick with me...

I started with an easy elastic waisted skirts with a ruffle.
To make this, you will need:
* about 0.5 cm fabric
* 1/4" elastic (waist measurement + 2cm)
Measure your child's waist. The length of the rectangle is 1.5 x the waist measurement and the height is however long you would like the first layer + 5cm for elastic casing. For Miss S (2 1/2 year old) my rectangle was 70cm x 25cm


Cut a rectangle for the ruffle - approx 1.5 x the length of the above rectangle; height - however long you want the ruffle + 2cm. For Miss S, my ruffle was 100cm x 17cm


Finally, thread the elastic through the elastic casing - a safety pin is always good to do this step.
I made a mini one for Miss E and teamed them with a stripy sash and spotty bandana.
More pirate like? I think so...


I love this photo - on tippy toes to get a better look at the cake!
Wednesday, 2 October 2013
Backless dress - behind the seams
My latest fashion geeky bedtime read has been this book:


This is an amazing insight into the world of Couture sewing and how to recreate some of those techniques. I was fascinated to learn that much of the sewing in a Couture workroom is hand sewing and I especially love this photo - it looks like a team of fashion elves weaving their magic!

I can promise you, that my dress was not wholly hand sewn but this book did inspire me to think more about the construction of my dress and some of those hidden details. So, today I thought I would share some of my favourite behind the seams details.
1. French seams
I have written of the virtues of French seams before and even construction a diy tutorial for them. They are incredibly easy and perfect for the fabric for my dress which frays really easily. They did become a challenge when I decided to do French seams with side seam pockets - can it be done? Yes, check out this easy tutorial on Sew Mamma Sew by Deborah Moebes to work out how. Easy!

2. Bound seams
This was more from necessity - the fabric I chose frayed if you looked at it the wrong way! I created bias binding from my lining fabric and used that to bind the edges of the seams in the centre back. It stopped the endless fraying and they look great - perfect!

3. Faced hem
For the hem, I wanted a crisp clean finish so I decided on created a faced hem. I used the strip of fabric I cut off from the dress when I adjusted the length. As well as providing a clean edge to the finished dress I think it creates an extra weight at the hem, which helps to give the dress its shape.

4. Machine stitched blind hem
I am undecided on this technique. I followed this super easy tutorial to work out how to create this on my machine - it turns out I had the stitch and the foot already, who knew! I did a few practice rounds on some scrap to get the hang of it but found when I sewed the hem, some of the blind stitches were quite large. Because the fabric is such a busy fabric I don't think you notice, but this is a technique I definitely need to practice.

The dress is almost complete - I just need to sew the hem of the lining! All am I waiting for now is a sunny day so I can don the dress (and the heels of course) for some pics of the finished dress!
Tuesday, 24 September 2013
Pattern testers
Anyone out there interested in pattern testing for me? I have a pattern ready to go for a baby sleeping bag - one with a zip up the middle. A great cosy and safe way for your baby to sleep. It comes in the 3 sizes (0-6 months; 6 - 12 months and; 12 - 18 months). My girls love them. In fact, I made one for my lovely friend Ems and her new baby Huey and I have one in the pipeline for my dear friend Mich and her new little baby girl... They are definitely my go to baby pressie!


So, how does the pattern testing work?
1. Send me an email at petitepatterns@mail.com saying - yes please, I would LOVE to pattern test!
2. I send you a copy of the pattern in PDF form as well as a questionnaire about the pattern. You need to print it out and put the pattern together following my instructions. Then, buy some fabric and make yourself a baby sleeping bag
3. Complete the questionnaire and send this back to me along with some clear photos of your new baby sleeping bag
This pattern should be good for a beginner sewer...
Win, win! Let's get pattern testing!
Friday, 20 September 2013
Backless dress
The dress is coming along well - I can't wait to share some of my favourite bits. Think bound seams, side seam pockets, french seams, fuchsia lining, 50's style box pleats...
In the meantime I did manage to buy some shoes and matching lipstick. Well, I am getting my priorities in order!

In the meantime I did manage to buy some shoes and matching lipstick. Well, I am getting my priorities in order!

Subscribe to:
Posts (Atom)