Stay tuned...
Monday, 12 January 2015
Begin Again
It has been over a year sine I last posted on this blog and my absence was not one that I anticipated or particularly welcomed. I got sick, very sick, and 2014 was a year of hospital treatments and surgery. That's not to say I didn't sew. I did and it was my one chance to grab a little moment of calm amongst a tremendous storm. 2015 doesn't bring a fully clean bill of health but it does bring a change of mindset. A determination - not to let illness define me but to carve out opportunities to do more and more of what I love to do, spend more time with people I love and to deal with whatever comes my way only when it happens. So be prepared for a recap of 2014's projects and some new projects for 2015 starting with the Watson Sewalong and this amazing Powernet...
Wednesday, 9 October 2013
Pirate costumes
From Couture to Pirates - can it be done? Well in this little corner of the internet, I say Yes!
This weekend we had a pirate themed 2nd birthday party. I was a little dubious about dressing the girls up as pirates, mainly because Miss S is Miss Independence and HAS to choose what she wears. I thought I might run into a little trouble convincing her to put on a pirate costume, especially as going to a party means a party dress and sparkly shoes. I can't help it - I have a mother and a mother-in-law who loving shopping for pretty dresses! For this reason I steered well clear of the pirate cliches of skulls and crossbones. I even avoided the nautical ones of anchors and sailing ships and instead chose fluro orange whales - not necessarily what jumps into mind when you think pirates, but stick with me...
I started with an easy elastic waisted skirts with a ruffle.
To make this, you will need:
* about 0.5 cm fabric
* 1/4" elastic (waist measurement + 2cm)
Measure your child's waist. The length of the rectangle is 1.5 x the waist measurement and the height is however long you would like the first layer + 5cm for elastic casing. For Miss S (2 1/2 year old) my rectangle was 70cm x 25cm
Cut a rectangle for the ruffle - approx 1.5 x the length of the above rectangle; height - however long you want the ruffle + 2cm. For Miss S, my ruffle was 100cm x 17cm
Finally, thread the elastic through the elastic casing - a safety pin is always good to do this step.
I made a mini one for Miss E and teamed them with a stripy sash and spotty bandana.
More pirate like? I think so...
I love this photo - on tippy toes to get a better look at the cake!
Wednesday, 2 October 2013
Backless dress - behind the seams
My latest fashion geeky bedtime read has been this book:
This is an amazing insight into the world of Couture sewing and how to recreate some of those techniques. I was fascinated to learn that much of the sewing in a Couture workroom is hand sewing and I especially love this photo - it looks like a team of fashion elves weaving their magic!
I can promise you, that my dress was not wholly hand sewn but this book did inspire me to think more about the construction of my dress and some of those hidden details. So, today I thought I would share some of my favourite behind the seams details.
1. French seams
I have written of the virtues of French seams before and even construction a diy tutorial for them. They are incredibly easy and perfect for the fabric for my dress which frays really easily. They did become a challenge when I decided to do French seams with side seam pockets - can it be done? Yes, check out this easy tutorial on Sew Mamma Sew by Deborah Moebes to work out how. Easy!
2. Bound seams
This was more from necessity - the fabric I chose frayed if you looked at it the wrong way! I created bias binding from my lining fabric and used that to bind the edges of the seams in the centre back. It stopped the endless fraying and they look great - perfect!
3. Faced hem
For the hem, I wanted a crisp clean finish so I decided on created a faced hem. I used the strip of fabric I cut off from the dress when I adjusted the length. As well as providing a clean edge to the finished dress I think it creates an extra weight at the hem, which helps to give the dress its shape.
4. Machine stitched blind hem
I am undecided on this technique. I followed this super easy tutorial to work out how to create this on my machine - it turns out I had the stitch and the foot already, who knew! I did a few practice rounds on some scrap to get the hang of it but found when I sewed the hem, some of the blind stitches were quite large. Because the fabric is such a busy fabric I don't think you notice, but this is a technique I definitely need to practice.
The dress is almost complete - I just need to sew the hem of the lining! All am I waiting for now is a sunny day so I can don the dress (and the heels of course) for some pics of the finished dress!
Tuesday, 24 September 2013
Pattern testers
Anyone out there interested in pattern testing for me? I have a pattern ready to go for a baby sleeping bag - one with a zip up the middle. A great cosy and safe way for your baby to sleep. It comes in the 3 sizes (0-6 months; 6 - 12 months and; 12 - 18 months). My girls love them. In fact, I made one for my lovely friend Ems and her new baby Huey and I have one in the pipeline for my dear friend Mich and her new little baby girl... They are definitely my go to baby pressie!
So, how does the pattern testing work?
1. Send me an email at petitepatterns@mail.com saying - yes please, I would LOVE to pattern test!
2. I send you a copy of the pattern in PDF form as well as a questionnaire about the pattern. You need to print it out and put the pattern together following my instructions. Then, buy some fabric and make yourself a baby sleeping bag
3. Complete the questionnaire and send this back to me along with some clear photos of your new baby sleeping bag
This pattern should be good for a beginner sewer...
Win, win! Let's get pattern testing!
Friday, 20 September 2013
Backless dress
The dress is coming along well - I can't wait to share some of my favourite bits. Think bound seams, side seam pockets, french seams, fuchsia lining, 50's style box pleats...
In the meantime I did manage to buy some shoes and matching lipstick. Well, I am getting my priorities in order!
Tuesday, 17 September 2013
Backless dress design - pattern drafting
In my previous post about the backless dress I am making to wear to a wedding in 6 weeks times I was deliberating between:
and
Well, the votes are in and I have decided on 50's chic. I couldn't get past the thought that the 80's glam looked more like a day dress - I can imagine it in a light Chambray or even a fun floral. I will definitely keep it in mind for a dress at a later date.
The drafting process for the bodice was an involved one. I started with a standard block and modified it according to the design. I firstly included french darts - I figured that these gave the dress more of a 50's look - and drafted the shoulder to sit slightly off shoulder (but not too off shoulder that it slid right off - certainly not a good look after a few champagnes!). I found I ended up taking a few centimetres off the shoulder seam to make sure it stayed put.
The back too had a few drafting tweaks. The curve of the backless design undertook a number of tucks to ensure that it didn't gape.
After 4 different toiles, each being subjected to various tucks and adjustments, I think I am finally happy with the fit.
I won't bother to draft a pattern piece for the skirt as the shape will be provided by the pleats. It will have 3 large box pleats in the front and 2 in the back as well as pockets in the side seams. The fabric is quite delicate and frays easily so I think I will use french seams. Side seam pockets with french seams - I do like a challenge!
and

Well, the votes are in and I have decided on 50's chic. I couldn't get past the thought that the 80's glam looked more like a day dress - I can imagine it in a light Chambray or even a fun floral. I will definitely keep it in mind for a dress at a later date.
The drafting process for the bodice was an involved one. I started with a standard block and modified it according to the design. I firstly included french darts - I figured that these gave the dress more of a 50's look - and drafted the shoulder to sit slightly off shoulder (but not too off shoulder that it slid right off - certainly not a good look after a few champagnes!). I found I ended up taking a few centimetres off the shoulder seam to make sure it stayed put.
The back too had a few drafting tweaks. The curve of the backless design undertook a number of tucks to ensure that it didn't gape.
After 4 different toiles, each being subjected to various tucks and adjustments, I think I am finally happy with the fit.
I won't bother to draft a pattern piece for the skirt as the shape will be provided by the pleats. It will have 3 large box pleats in the front and 2 in the back as well as pockets in the side seams. The fabric is quite delicate and frays easily so I think I will use french seams. Side seam pockets with french seams - I do like a challenge!
Friday, 6 September 2013
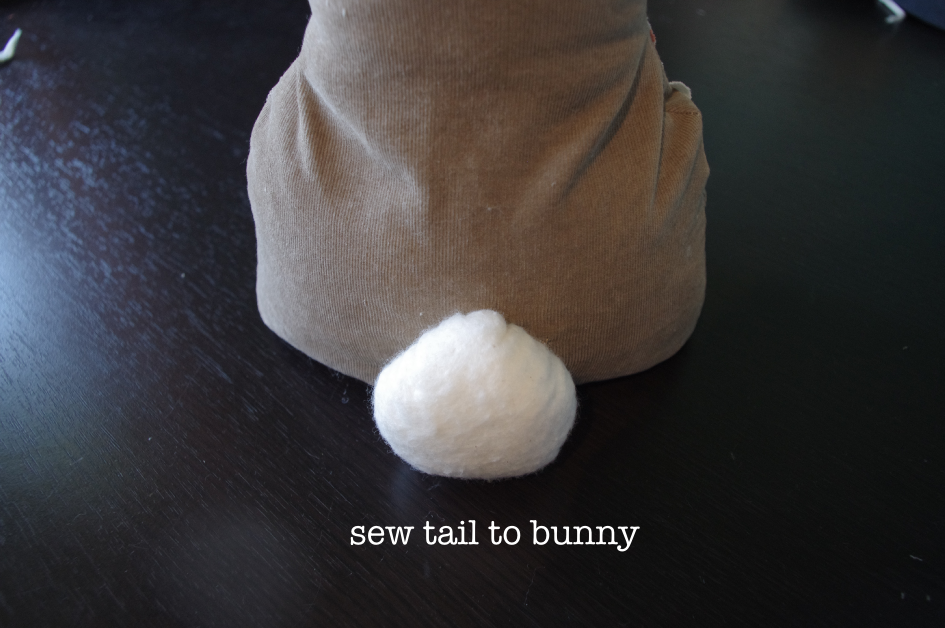
Bunny Bookend
I am busily trying to complete some projects for Miss S's room to make it more into a cosy toddler bedroom. I bought a bookcase for her books and moved them all upstairs so they no longer clutter our lounge room. Books, as you know, are a pest to keep nice and orderly on a bookshelf and almost impossible when you have a curious toddler pulling them off all the time. I searched for some interesting and cute bookends but couldn't find any so decided to have a go at making the pattern myself. Miss S has a love of rabbits so a bunny bookend was an obvious choice. I think she looks great holding up the books.
To make one, print out the pattern and follow the instructions below. I filled her with rice to make her nice and sturdy to hold books but there is no reason why she couldn't be filled with ordinary stuffing for a cute child's toy.
You will need:
30 cm fabric for bunny
Scraps of fabric for tummy and ear lining
Felt for face and tail
Stuffing or rice (for a more sturdy bunny)
black thread
Cut:
2 body pieces (front and back)
4 ear pieces (2 of lining fabric)
1 face
1 tummy
1 tail
I think she looks great perched on the shelf or, she does a stellar job as a doorstop as well!
Subscribe to:
Posts (Atom)