Pages

Wednesday 9 October 2013

Pirate costumes


From Couture to Pirates - can it be done? Well in this little corner of the internet, I say Yes!
This weekend we had a pirate themed 2nd birthday party. I was a little dubious about dressing the girls up as pirates, mainly because Miss S is Miss Independence and HAS to choose what she wears. I thought I might run into a little trouble convincing her to put on a pirate costume, especially as going to a party means a party dress and sparkly shoes. I can't help it - I have a mother and a mother-in-law who loving shopping for pretty dresses! For this reason I steered well clear of the pirate cliches of skulls and crossbones. I even avoided the nautical ones of anchors and sailing ships and instead chose fluro orange whales - not necessarily what jumps into mind when you think pirates, but stick with me...


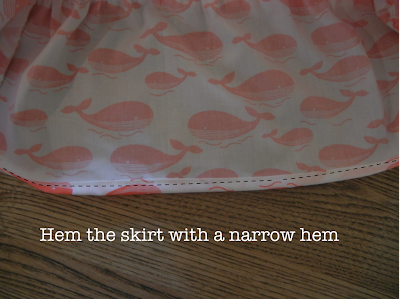
I started with an easy elastic waisted skirts with a ruffle.

To make this, you will need:
* about 0.5 cm fabric
* 1/4" elastic (waist measurement + 2cm)

Measure your child's waist. The length of the rectangle is 1.5 x the waist measurement and the height is however long you would like the first layer + 5cm for elastic casing. For Miss S (2 1/2 year old) my rectangle was 70cm x 25cm


Cut a rectangle for the ruffle - approx 1.5 x the length of the above rectangle; height - however long you want the ruffle + 2cm. For Miss S, my ruffle was 100cm x 17cm


Finally, thread the elastic through the elastic casing - a safety pin is always good to do this step.

I made a mini one for Miss E and teamed them with a stripy sash and spotty bandana. 

More pirate like? I think so...


I love this photo - on tippy toes to get a better look at the cake!

Wednesday 2 October 2013

Backless dress - behind the seams

My latest fashion geeky bedtime read has been this book:


This is an amazing insight into the world of Couture sewing and how to recreate some of those techniques. I was fascinated to learn that much of the sewing in a Couture workroom is hand sewing and I especially love this photo - it looks like a team of fashion elves weaving their magic!


I can promise you, that my dress was not wholly hand sewn but this book did inspire me to think more about the construction of my dress and some of those hidden details. So, today I thought I would share some of my favourite behind the seams details.

1. French seams
I have written of the virtues of French seams before and even construction a diy tutorial for them. They are incredibly easy and perfect for the fabric for my dress which frays really easily. They did become a challenge when I decided to do French seams with side seam pockets - can it be done? Yes, check out this easy tutorial on Sew Mamma Sew by Deborah Moebes to work out how. Easy!


2. Bound seams
This was more from necessity - the fabric I chose frayed if you looked at it the wrong way! I created bias binding from my lining fabric and used that to bind the edges of the seams in the centre back. It stopped the endless fraying and they look great - perfect!


3. Faced hem
For the hem, I wanted a crisp clean finish so I decided on created a faced hem. I used the strip of fabric I cut off from the dress when I adjusted the length. As well as providing a clean edge to the finished dress I think it creates an extra weight at the hem, which helps to give the dress its shape.


4. Machine stitched blind hem
I am undecided on this technique. I followed this super easy tutorial to work out how to create this on my machine - it turns out I had the stitch and the foot already, who knew! I did a few practice rounds on some scrap to get the hang of it but found when I sewed the hem, some of the blind stitches were quite large. Because the fabric is such a busy fabric I don't think you notice, but this is a technique I definitely need to practice.


The dress is almost complete - I just need to sew the hem of the lining! All am I waiting for now is a sunny day so I can don the dress (and the heels of course) for some pics of the finished dress!